- Published on
Introduction and Hands-On with AWS SES
- Authors

- Name
- QuizCld
Overview
Amazon Simple Email Service (SES) is a cloud-based email service designed for sending marketing, transactional, and notification emails. It leverages AWS's infrastructure to ensure high deliverability, scalability, and cost-effectiveness, making it a go-to solution for businesses. SES also supports email receiving, enabling applications to process customer inquiries efficiently. Trusted by companies like Netflix and Duolingo, SES handles over a trillion emails annually.
Key Features for Production
SES is built for production environments, offering:
| Feature | Description |
|---|---|
| High Deliverability | Uses DKIM, SPF, and DMARC to ensure emails reach inboxes, not spam folders. |
| Scalability | Automatically scales to handle any email volume, from small batches to millions. |
| Cost-Effective Pricing | Pay-as-you-go model: 0.12 per GB of attachments. Free tier includes 62,000 emails/month for EC2-hosted apps. |
| Integration | Seamlessly integrates with AWS services like SNS, EC2, Lambda, and S3. |
| IP Management | Offers dedicated ($24.95/month), shared, or owned IPs for better deliverability. |
| Analytics | Provides detailed sender statistics and deliverability reports. |
| SMTP and API Access | Supports sending via SMTP or AWS SES API for flexibility. |
| Email Receiving | Enables processing of incoming emails with flexible options and Lambda triggers. |
Integration with AWS Services
SES enhances email workflows through integration with:
- Amazon SNS: Triggers emails based on events (e.g., user sign-ups or order confirmations)
- Amazon EC2: Sends emails directly from instances
- AWS Lambda: Automates email sending based on application events
- Amazon S3: Stores email templates or attachments for efficient management
Sandbox Mode is Default for Users
When you start with SES, your account is in sandbox mode, which restricts sending to verified email addresses and limits you to 200 messages per 24 hours. This mode:
- Helps users learn SES functionality safely
- Prevents accidental spamming of real users
- Protects AWS's sending IPs from being blacklisted
- Ensures responsible use before production access
Hands-On: Sending a Test Email in Sandbox Mode
This guide walks you through sending a test marketing email from a custom domain (e.g., "abc@xyz.com") in sandbox mode.
Step 1: Purchase a Domain
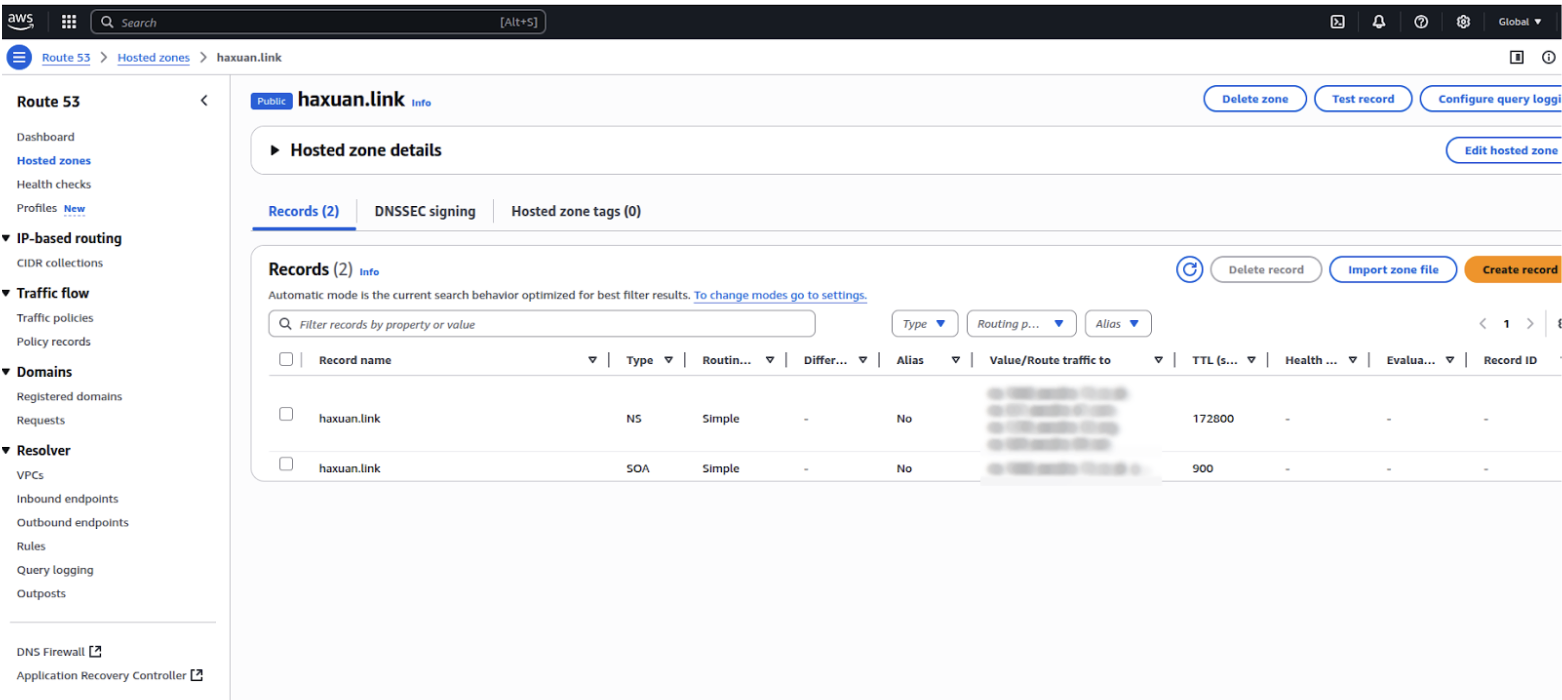
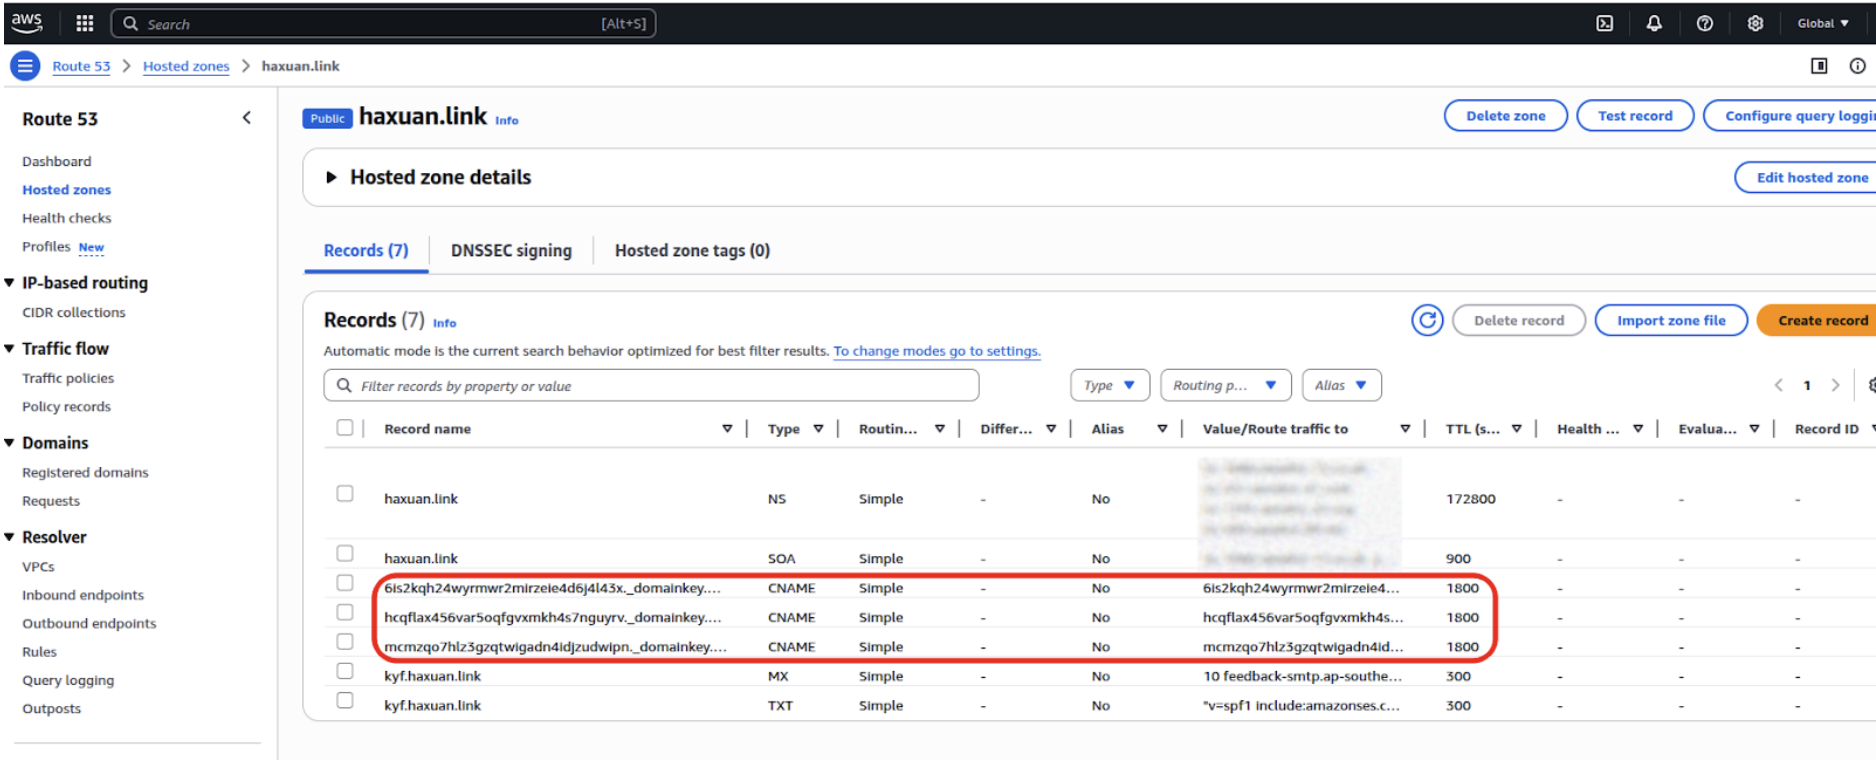
Buy a domain from AWS Route 53, GoDaddy, NameCheap or any domain providers. AWS-purchased domains automatically create a hosted zone in Route 53 with DNS records (e.g., Name Server records).
Note: AWS will automatically create 1 hosted zone with records on Route53
Step 2: Verify the Domain in SES
This step is authentication must to have, allows SES to send mails for your domain safely.
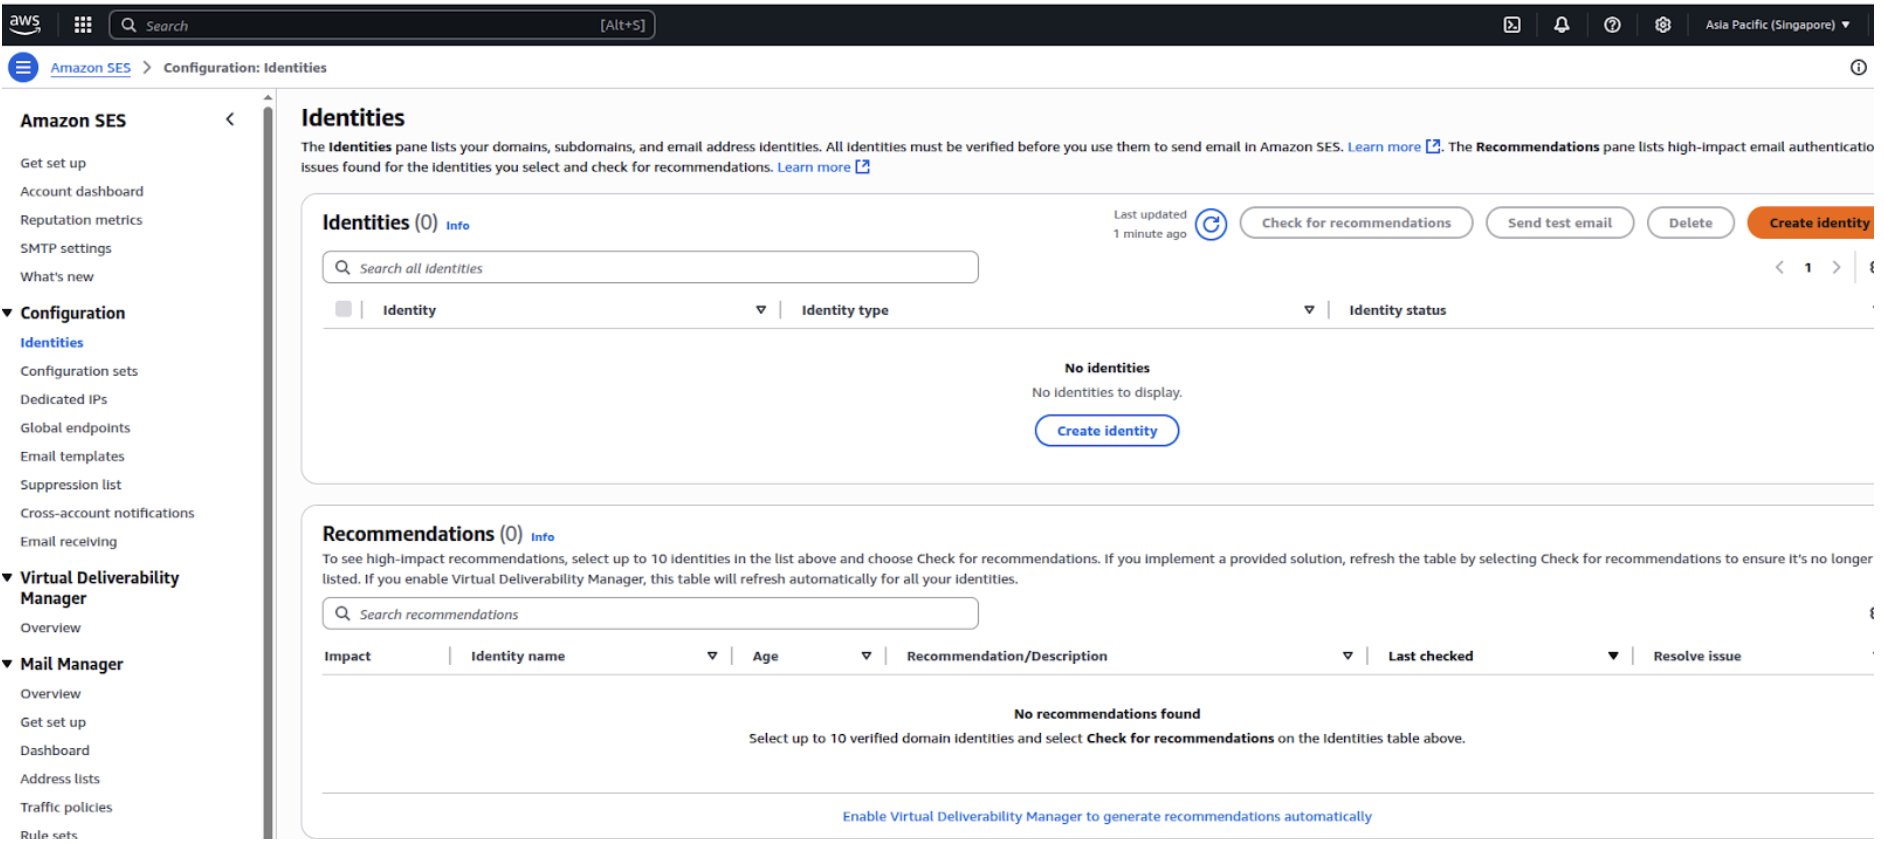
- In the AWS SES console, choose Region, go to Identities and select Create identity
- Fill out the form information, form subdomain if you want address like subdomain@domain (abc.kyf@haxuan.link)
- After clicking Create identity, your domain identity will be in pending status
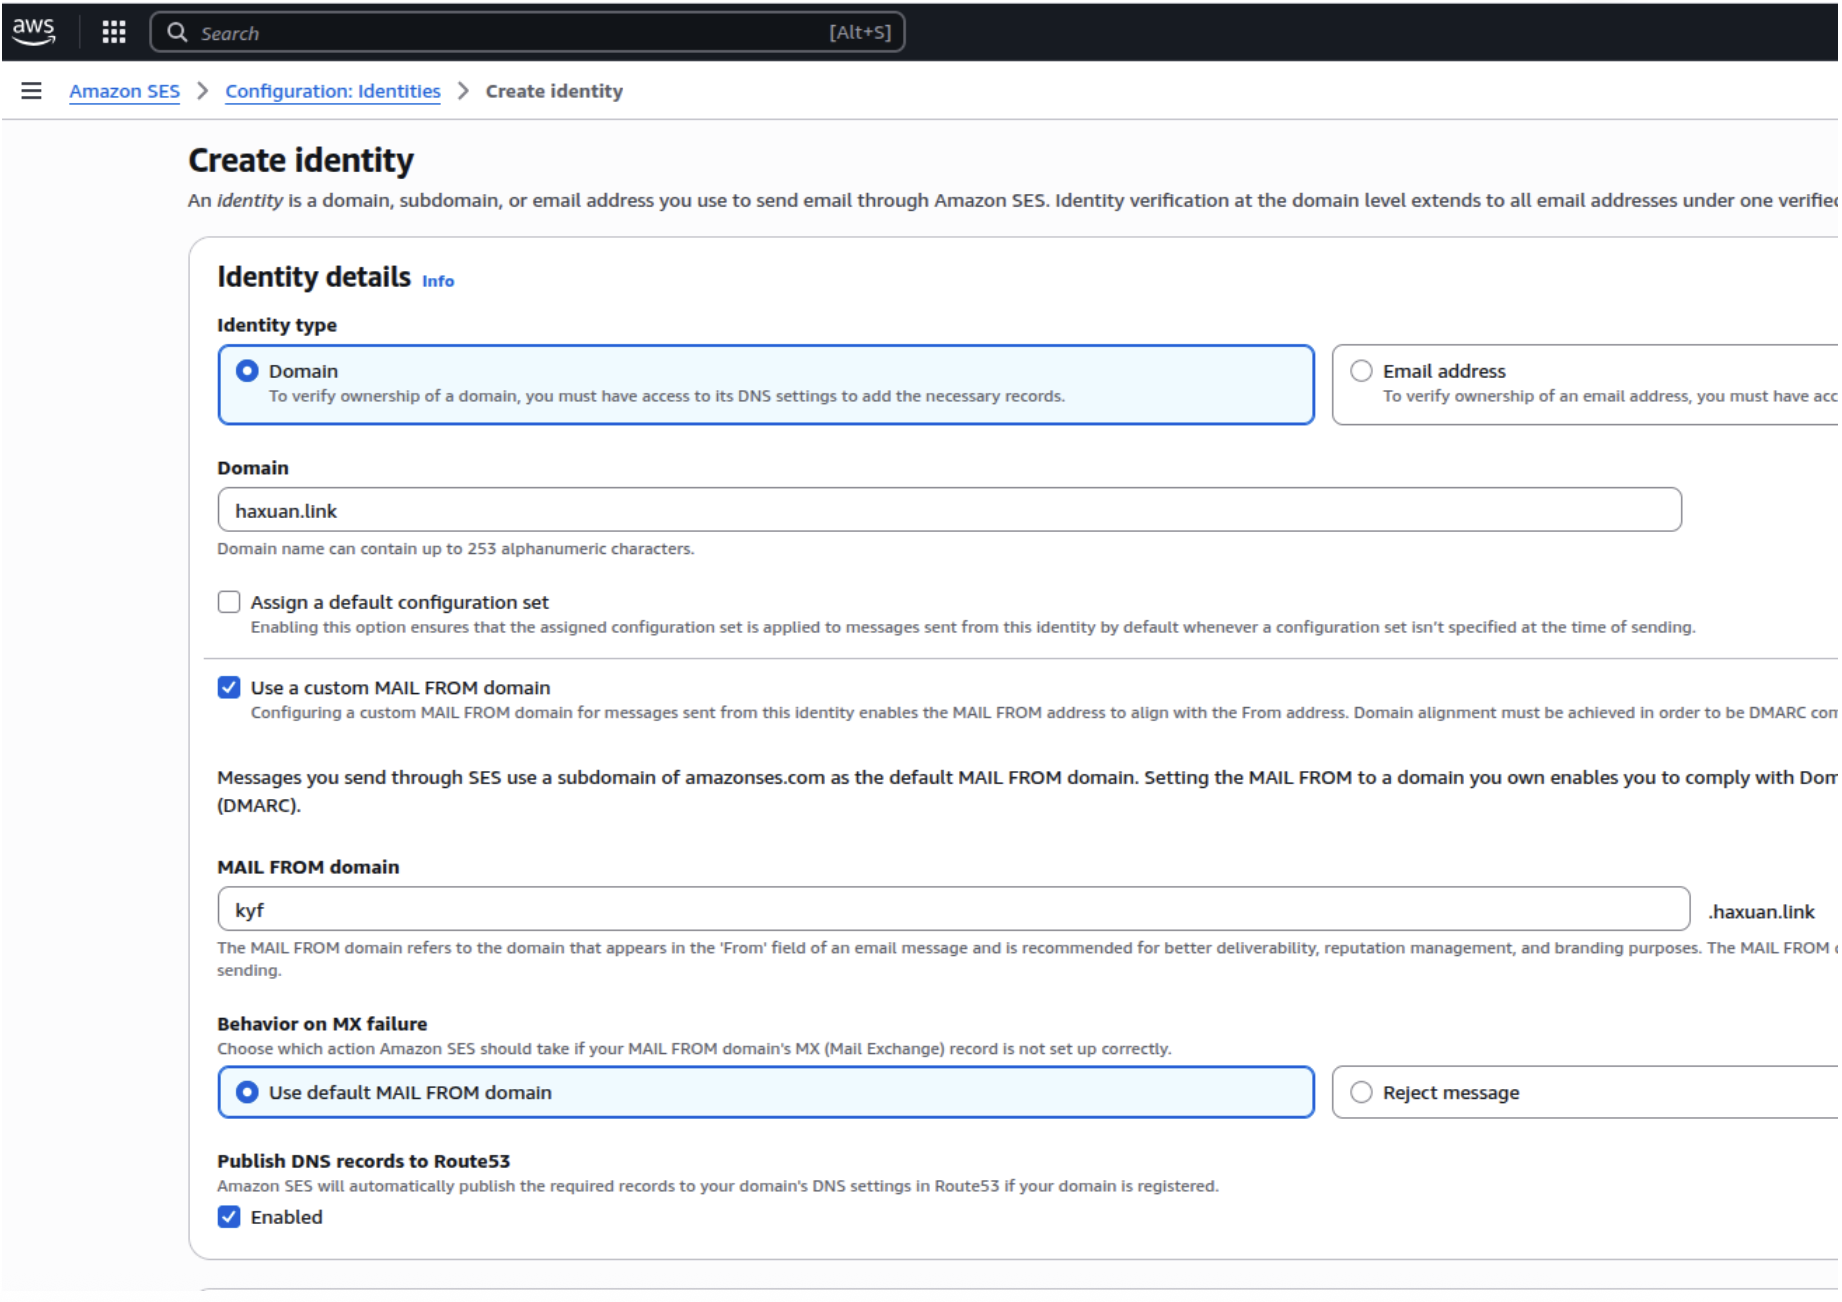
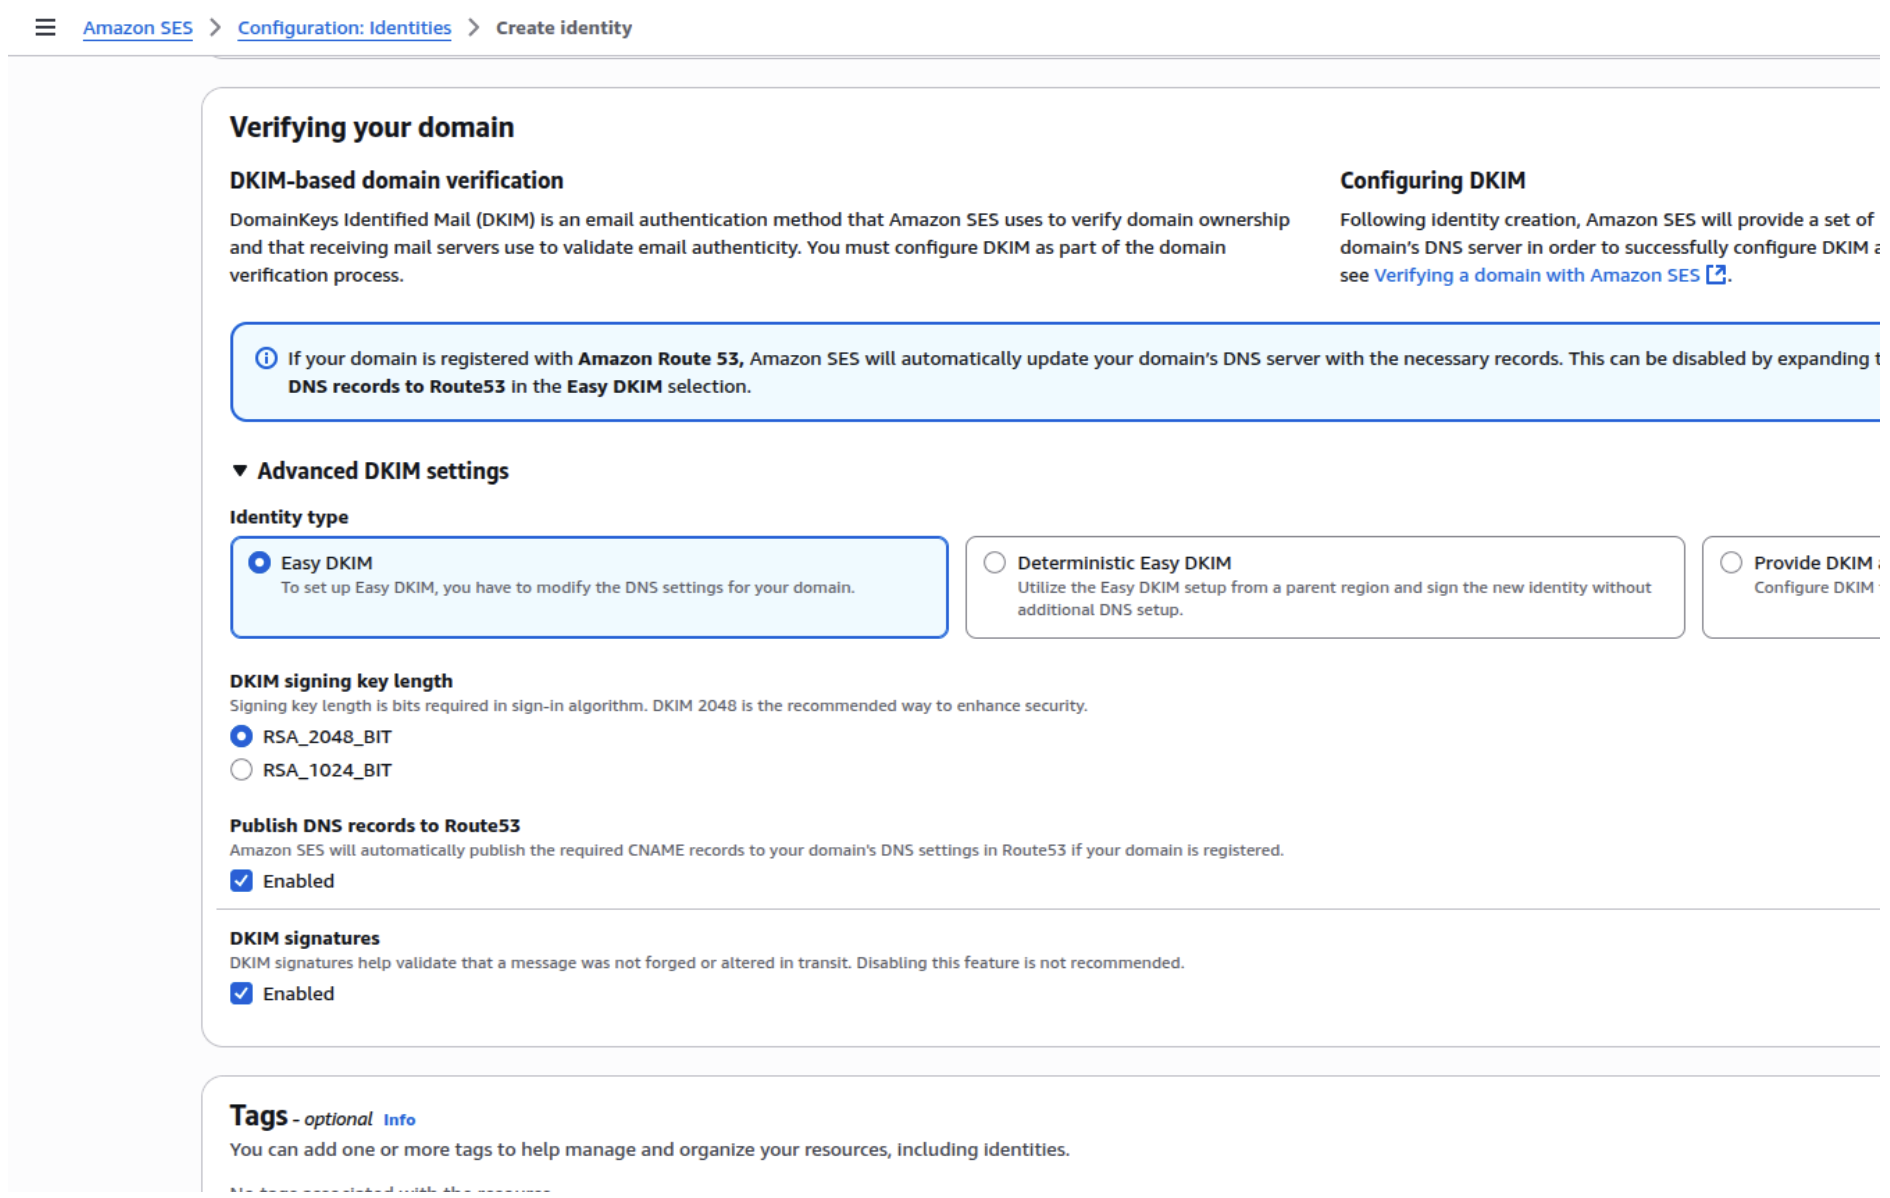
SES will automatically generate DNS records (DKIM, SPF, and optional Custom MAIL FROM domain) for authentication. If domain provider is not AWS, you must add these DNS records to the provider: DNS Configuration Guide
For AWS-purchased domains, Route 53 automatically adds these records. For others, manually add them to your registrar's DNS settings.
Step 3: Check Verification Status
After completing the previous step, we wait some minutes for AWS to process:
- In the SES console, check the domain's status under Identity
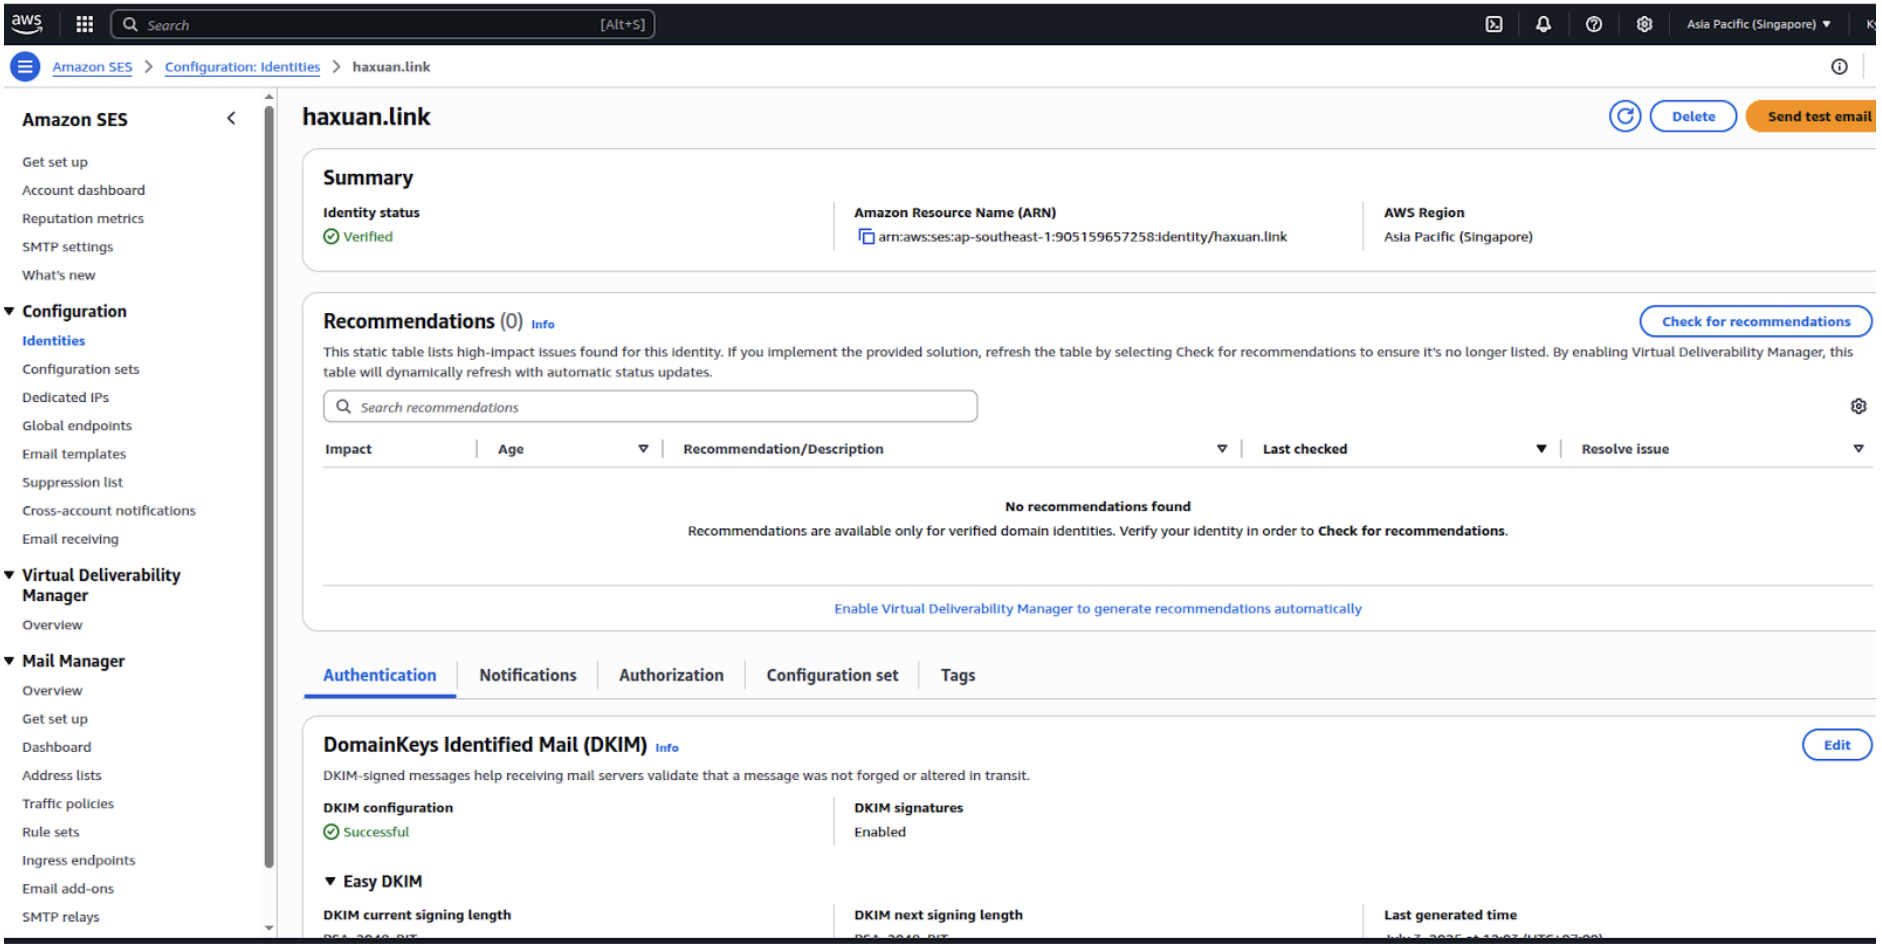
Note: Verification typically takes less than 5 minutes for AWS domains. If it takes longer, check for issues like domain expiration (a common mistake) or other problems.
Once verified, SES sends a confirmation email, and the status updates to "Verified."
Step 4: Verify Email Addresses
In sandbox mode (by default), you can only send mails to verified receiver email addresses. So, after sending mails, we must verify the email of the receiver - it's a limitation of sandbox mode but also a safe mode, introductory step for new users.
- Go to Identity > Create identity with sender email (e.g., "no-reply.kyf@haxuan.link") and recipient email (e.g., "kyxuan0000@gmail.com")
- AWS SES will send verification request to recipient mail. Need to click the link to verify the request
- Check on dashboard if verification is successful
Result: Now we can start to send 1 email from verified domain to verified email!
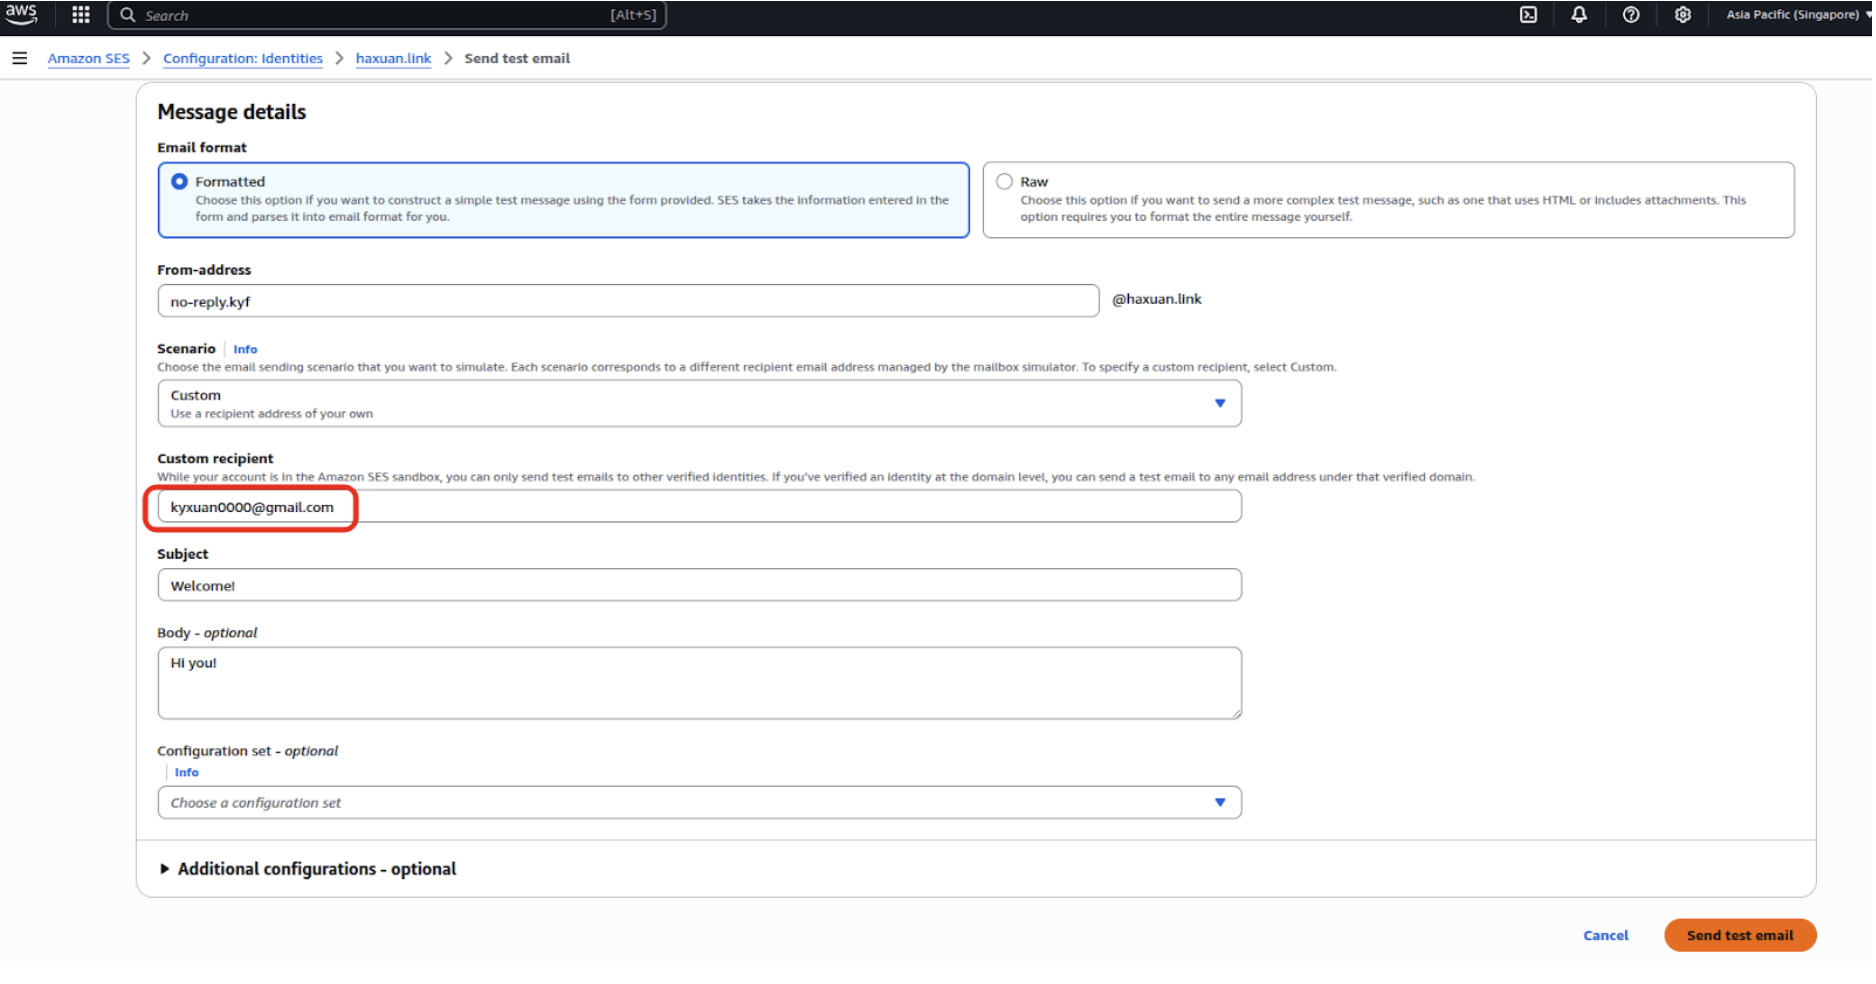
Step 5: Send a Test Email
In the SES console, go to Identities, select the verified domain, click Send test email

Fill in the verified recipient's email and the rest of the form
Check the recipient email
Conclusion
AWS SES is easy for beginners to set up and test manual email sending. Starting in sandbox mode allows safe experimentation before scaling to production. Easy to test with verified domains and verified emails on the console.
In next blogs, we will implement out of sandbox mode, integrate with AWS SNS, AWS Lambda or a webhook endpoint, track user behavior and use AWS SDK for programming.